
Creating a carousel post on LinkedIn is usually the point where most serious creators pause. Not because they don’t see the value, but because the process feels heavier than it should.
You already know LinkedIn carousels work. You’ve seen them dominate the feed, earn saves, and drive profile visits. The problem isn’t whether to use them; it’s how to create a carousel post on LinkedIn without wasting time, overdesigning slides, or guessing what structure actually keeps people swiping.
In this guide, you’ll learn two proven ways to create a LinkedIn carousel. First, the traditional method: design in Canva and publish directly to LinkedIn. Second, an end-to-end workflow using Supergrow — from idea to carousel to publish — built for creators who want speed, consistency, and results without juggling multiple tools.
Create a Carousel Post on LinkedIn Using Canva
This method walks you through creating a LinkedIn carousel in Canva and publishing it directly to LinkedIn. It’s ideal if you prefer hands-on design control and want to build carousel posts manually before uploading them as PDFs.
Step 1: Set Up Canva With the Right LinkedIn Carousel Specs
Before choosing templates or designing slides, prioritize setting up Canva correctly for LinkedIn carousel creation. This avoids formatting issues later and ensures your carousel looks professional across desktop and mobile.
What to do in this step:
Create or log in to your Canva account (the free plan is sufficient for most carousel posts).
Start with a custom design or a LinkedIn-specific carousel template rather than generic presentations.
Ensure your canvas uses a square or vertical-friendly layout (commonly 1080×1080 or 1080×1350) to maximise feed visibility.
Decide upfront whether this carousel is educational, opinion-led, or step-based so the design supports the content goal.
Step 2: Choose a Template That Supports Reading, Not Decoration
The goal of a LinkedIn carousel isn’t visual complexity—it’s readability in a fast-scrolling feed. Your template should help people consume the message slide by slide, not distract them with heavy design elements.
What to cover in this step:
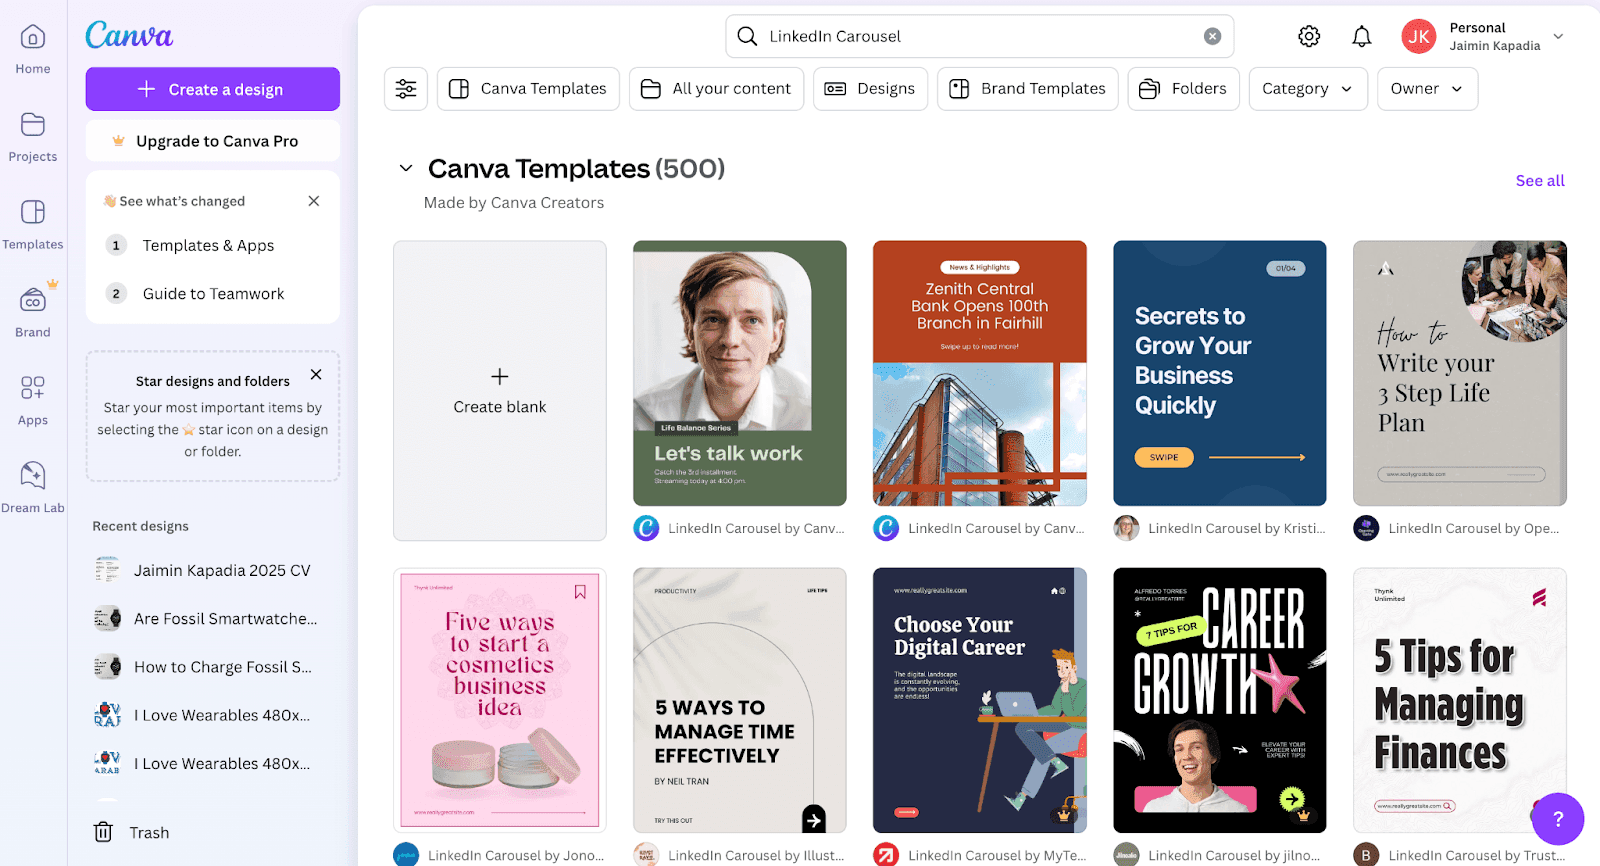
Search Canva for LinkedIn carousel or square presentation templates and filter for free options if needed.
Prioritise templates with:
Large, legible text areas
Consistent spacing across slides
Minimal colours and fonts (1–2 max)
Avoid templates that rely heavily on stock images, dense backgrounds, or small text blocks.
Select a layout that can be duplicated easily across slides to maintain visual consistency.
Step 3. Design Your Cover Slide
Your cover slide decides whether the carousel gets ignored or explored. On LinkedIn, people don’t open carousels intentionally—they swipe only if the first slide clearly promises value.
What to cover in this step:
Write one clear outcome-driven headline, not a vague topic.
Weak: “Marketing Tips”
Strong: “Marketing Strategies That Doubled Our Sales.”
Focus on one idea only—no subheadlines, no clutter.
Use large text that’s readable on mobile (this matters more than desktop).
Add a subtle directional cue like “Swipe →” to signal interaction.
Keep branding minimal (logo or face is optional, not mandatory).

Design guidelines to follow:
High contrast between text and background
No more than 6–8 words in the headline
Avoid decorative fonts—clarity beats style
Why this matters: The cover slide is not a design asset—it’s a hook. If it doesn’t communicate why someone should swipe in under one second, the rest of the carousel won’t matter.
Step 4: Structure Content Slides for Momentum
Once the cover earns the swipe, the rest of the carousel has one job: keep the reader moving forward. High-performing LinkedIn carousels are not mini blog posts split across slides—they’re tightly structured narratives where each slide delivers one clear idea and creates curiosity for the next.
If a slide tries to explain too much, the swipe stops. This step is about designing momentum: turning your message into a sequence that feels easy to consume, logically connected, and rewarding all the way through to the final slide.
What to cover in this step:
Plan the carousel before designing: one core idea per slide.
Follow a simple flow: Problem → Insight → Example → Action (not all on one slide).
Start each slide with a clear headline that advances the story.
Keep body text short—aim for 2–4 lines max per slide.
Use numbers or sequencing to create forward motion.
Design rules to apply consistently:
Duplicate the first content slide to maintain layout consistency.
Maintain the same font sizes, spacing, and color hierarchy across slides.
Use visuals only if they clarify the idea, not decorate it.
Prioritise mobile readability over aesthetics.
Pro Tip — In Canva, create your first content slide completely, then duplicate it and modify the copy and images. This will help you maintain consistency throughout your carousel.
Step 5: Save and Export Your Carousel in the Right Format
Once your slides are final, the way you export your carousel directly impacts how it performs on LinkedIn. A poorly exported file can lead to slow loading, blurry text, or formatting issues—any of which can break the swipe experience and reduce engagement, even if the content is solid.
Here’s how to export your carousel correctly using Canva:
Click Share in the top-right corner and select Download
Choose PDF Standard (not PDF Print) to keep the file size lightweight for LinkedIn
Ensure All pages are selected before downloading
Download the file and open it locally to review every slide
Before publishing, do a quick quality check:
Review the PDF on mobile to ensure text is readable without zooming
Check that no text or visuals are cut off near the edges
Confirm consistent spacing, fonts, and colors across all slides
Make sure the flow feels smooth from the first slide to the last
Once your carousel is properly saved as a PDF, you're ready to move on to the exciting part — posting it on LinkedIn!
How to Post a Carousel on LinkedIn
The carousel posting process on LinkedIn is straightforward, but there are a few specific steps to follow to make sure your carousel appears correctly.
Open Your LinkedIn Account
First, log in to your LinkedIn account and make sure you're on the homepage, where you can see your feed.
Before you can begin the posting process, you need to check a few things:
Verify you're logged into the right account (if you manage multiple LinkedIn profiles)
Have your carousel PDF file ready and accessible on your device
Check that you're on the desktop version of LinkedIn for the best posting experience
While you can post carousels from LinkedIn's mobile app, it's usually easier to do it from your computer. This is because the desktop version gives you better control over how your post looks and makes it easier to write longer captions.
Click on ‘Start a Post’
Once you're on your LinkedIn homepage, look for the "Start a post" box at the top of your feed.

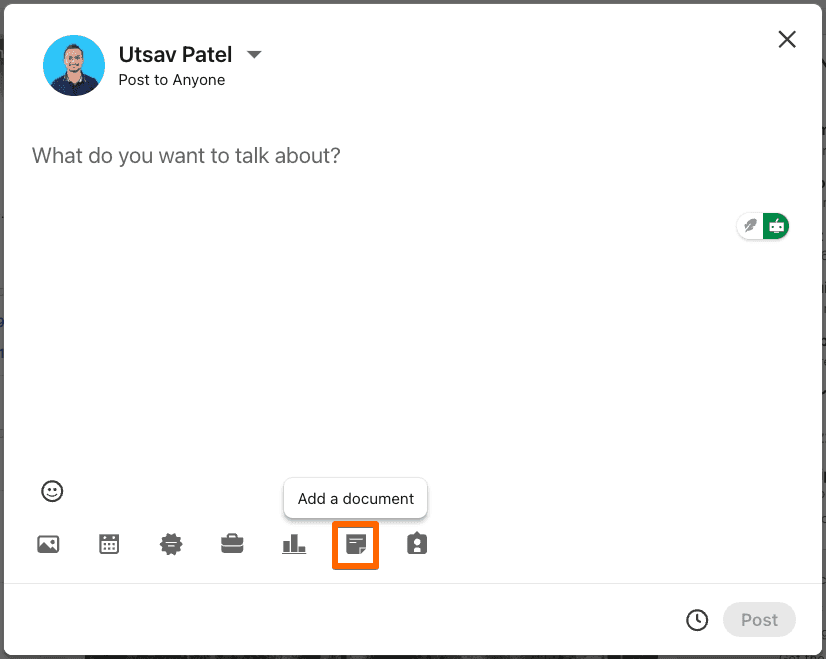
When you click this box, a new window will open. You'll see several options for creating your post, including buttons for adding photos, videos, and documents.
To post your carousel, use the document upload feature.
If you're posting from a company page, make sure you've selected the correct page first.
You can do this by clicking on the "Me" icon in the top navigation bar and selecting your company page from the dropdown menu.
Finally, verify the profile picture of the account you're posting from in the top-left corner of the post creator to ensure you’ve selected the correct profile.
Upload Your Carousel PDF and Review the Slide Preview
In the post composer, click the document (file) upload icon and select your carousel PDF from your device. LinkedIn will process the file and automatically convert it into a swipeable carousel.
Once the upload completes, pause here and review the slide previews carefully. This is your final quality check before the post goes live.
Use this quick checklist as you review:
All slides are visible and in the correct order
Text is readable on smaller screens (especially the first two slides)
No elements are cut off near the edges
Visual consistency is intact across slides
If something looks off, cancel the post, fix the file, and re-upload. A clean preview ensures your carousel delivers a smooth swipe experience when it appears in the feed.
Write an Engaging Caption for Your Carousel Post
With your carousel uploaded and reviewed, your next job is to frame the content, not explain it. The caption’s role is simple: stop the scroll and give readers a reason to swipe.
Start with a strong opening line that speaks directly to the problem or outcome your carousel addresses. This should feel specific, not promotional. Follow it with one or two short lines that set context—what the carousel helps them understand, fix, or rethink—without revealing the full value.
When writing the caption, keep these principles in mind:
Lead with a hook, not an introduction
Tease the insight instead of summarising every slide
Keep paragraphs short for mobile readability
End with a clear swipe cue (e.g., “Swipe to see the framework →”)
Avoid hashtags or CTAs that distract from the swipe. Your caption exists to move the reader from feed to slide one—nothing more.
Publish Your Post
You’re now almost ready to share your LinkedIn carousel.
Before hitting that "Post" button, it is highly recommended to do some final checks:
Review your caption for any typos or errors
Make sure all your slides are showing up in the preview
Verify that any hashtags are spelled correctly
Check that you're posting from the right account
If everything looks perfect, it’s time to hit the “Post” button.
Remember, LinkedIn's algorithm favors posts that generate early engagement, so sharing at the right time and being active right after posting can help your carousel reach more people.
Why the Canva Method Breaks at Scale
Creating LinkedIn carousels with Canva is effective when done occasionally. But once carousels become part of your regular content strategy, the cracks start to show. You ideate in one place, write copy in another, design slides separately, export PDFs, then switch back to LinkedIn to publish—every single time.
This scattered workflow slows you down, makes consistency hard, and turns high-performing formats into a time drain instead of a growth lever. If you want to create, manage, and publish carousels regularly without juggling tools or repeating manual work, you need a more integrated approach.
That’s exactly where Supergrow comes in—giving you a single LinkedIn-first workflow to create, design, publish, and scale carousel posts without switching tools or breaking momentum.
Generate Engaging LinkedIn Carousels with Supergrow
Below is the exact workflow for creating, designing, and publishing LinkedIn carousels in one place—without switching tools or losing momentum.
Step 1: Log in to your Supergrow account
Supergrow is built specifically to close the gap of content production and publishing. As a social media tool designed specifically for LinkedIn, Supergrow helps in the entire LinkedIn content lifecycle—from ideation and drafting to publishing, engagement, and performance tracking–Including the creation of LinkedIn carousels.
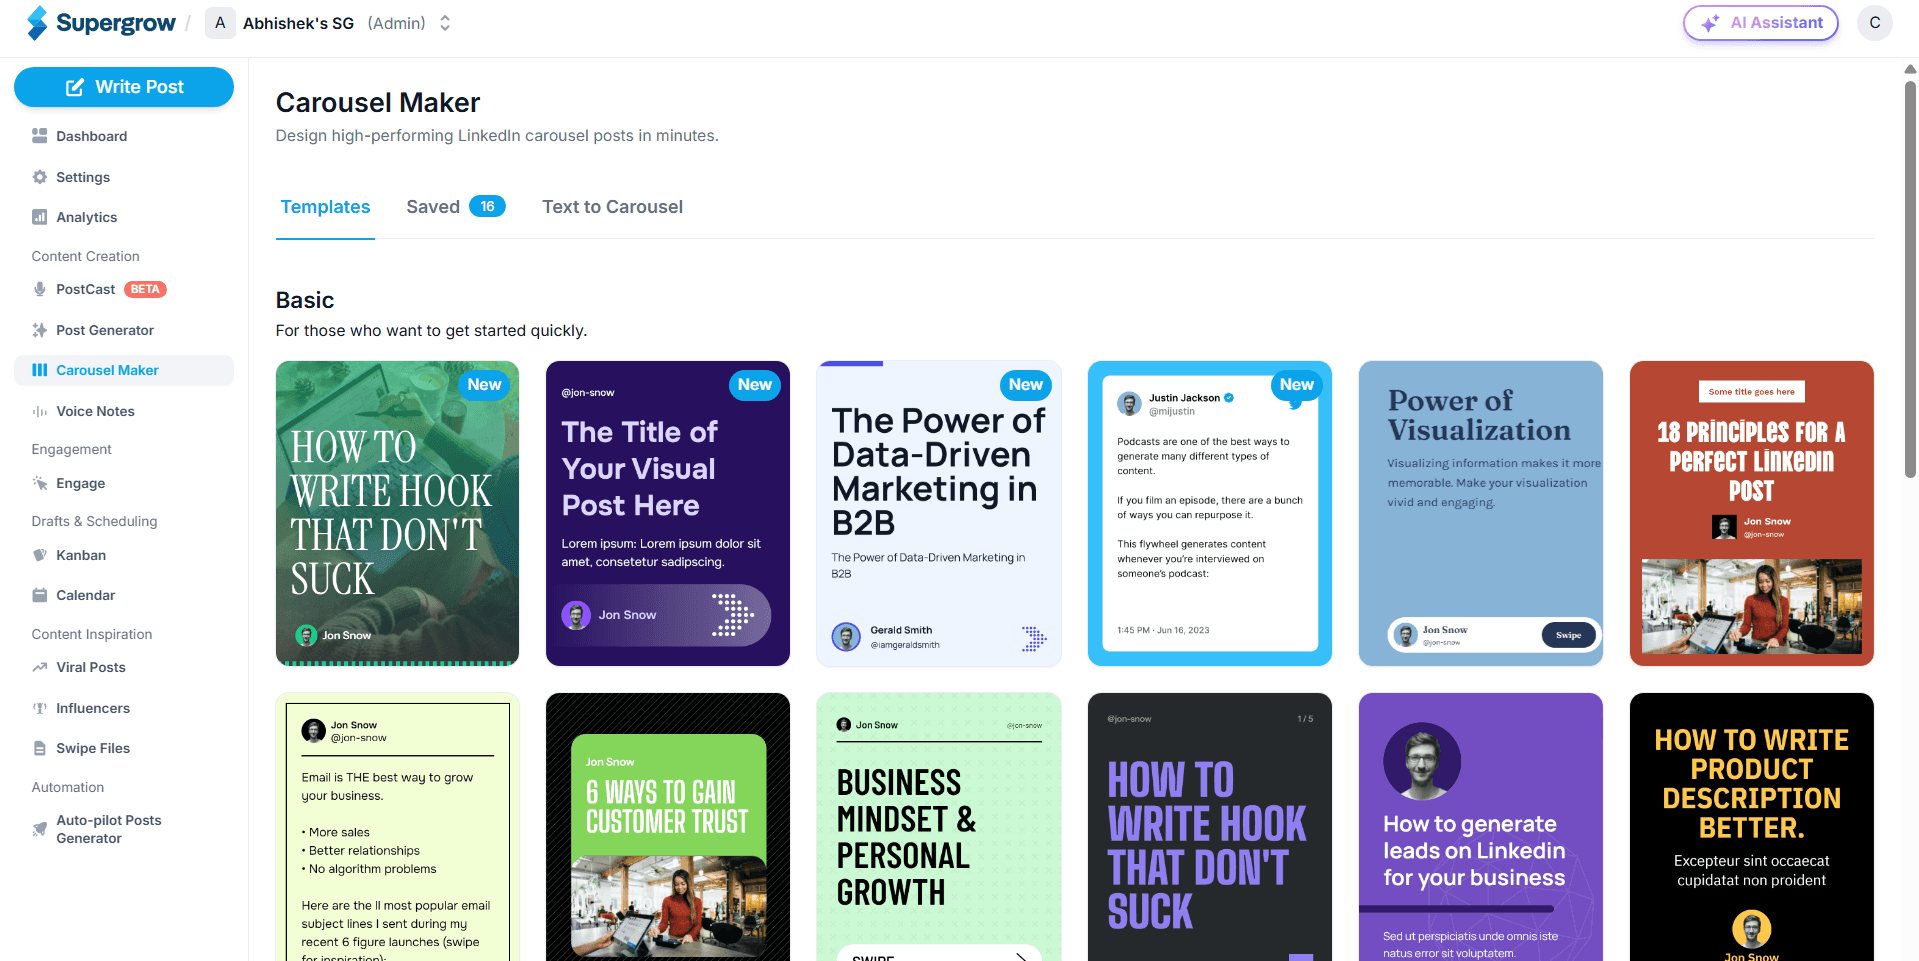
With readymade templates, you can create eye-catching LinkedIn carousels in minutes.
So head up to Supergrow and click on the ‘Get started for free’ button in the top right corner.
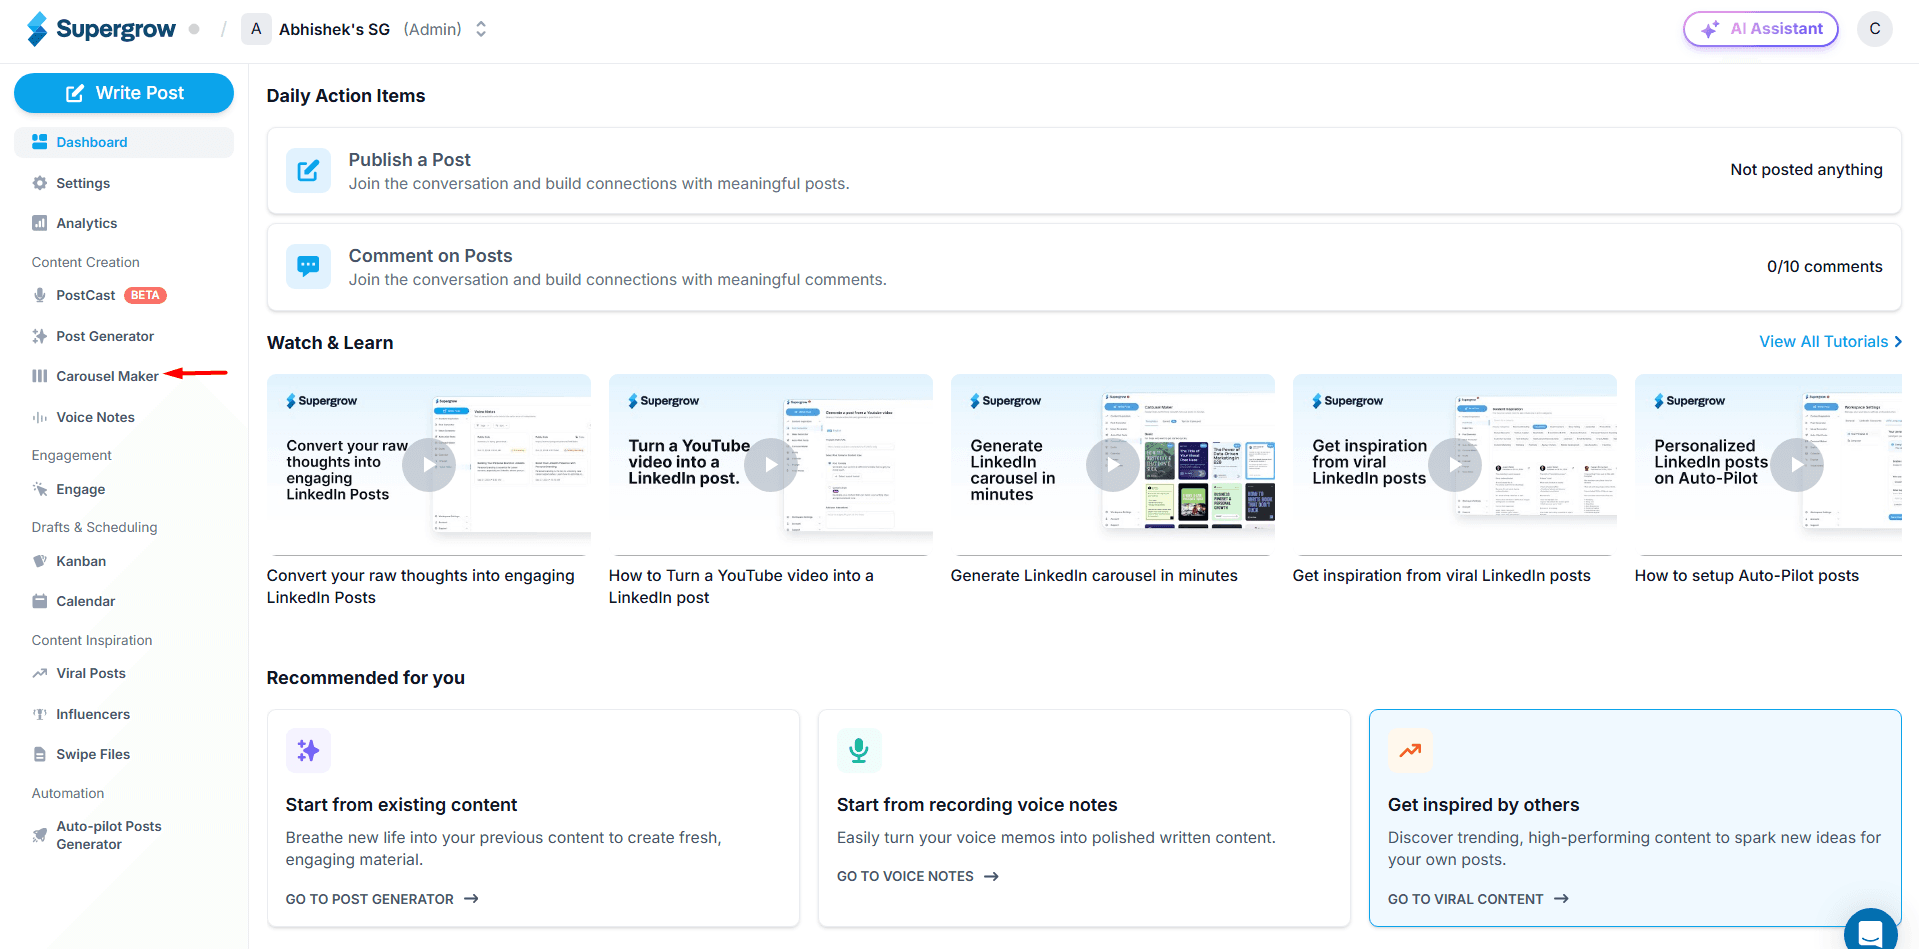
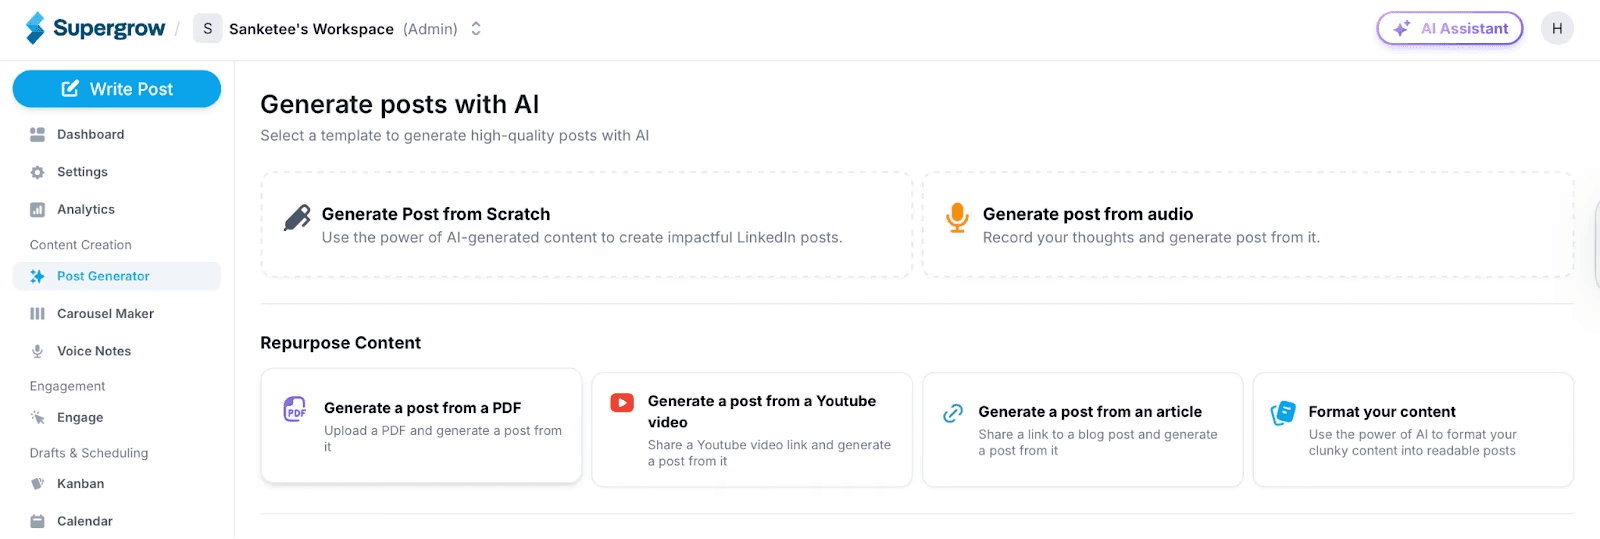
Once you've logged in, the Supergrow interface is simple to navigate. You’ll see all of Supergrow's features on the left side.
Simply, click on the Supergrow carousel maker to get started.
Step 2. Choose a LinkedIn Carousel Template
Now that you have your Supergrow account set up, it's time to find the perfect template for your carousel post.
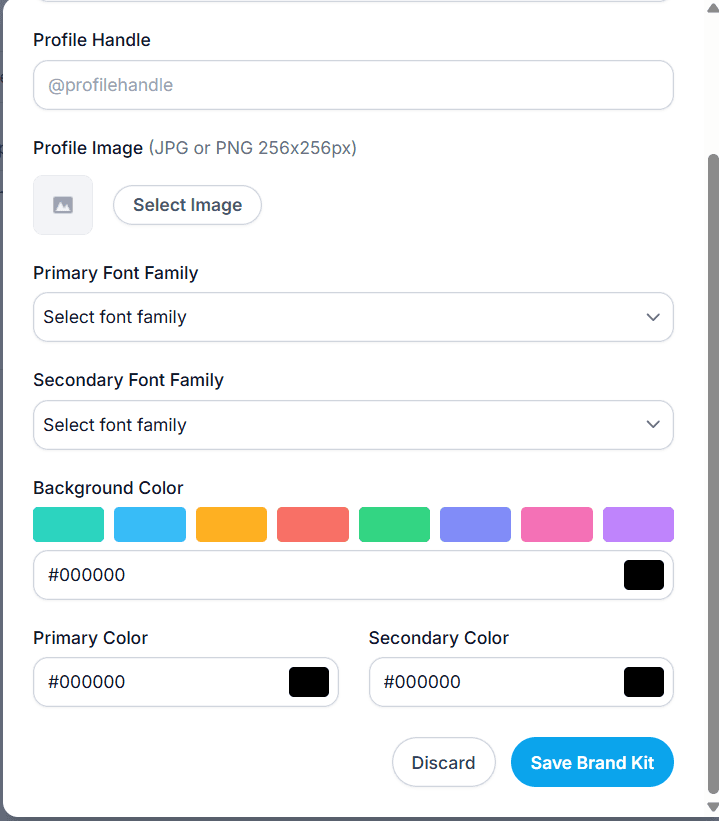
When selecting a template, keep this in mind: choose a design that matches your brand colors.
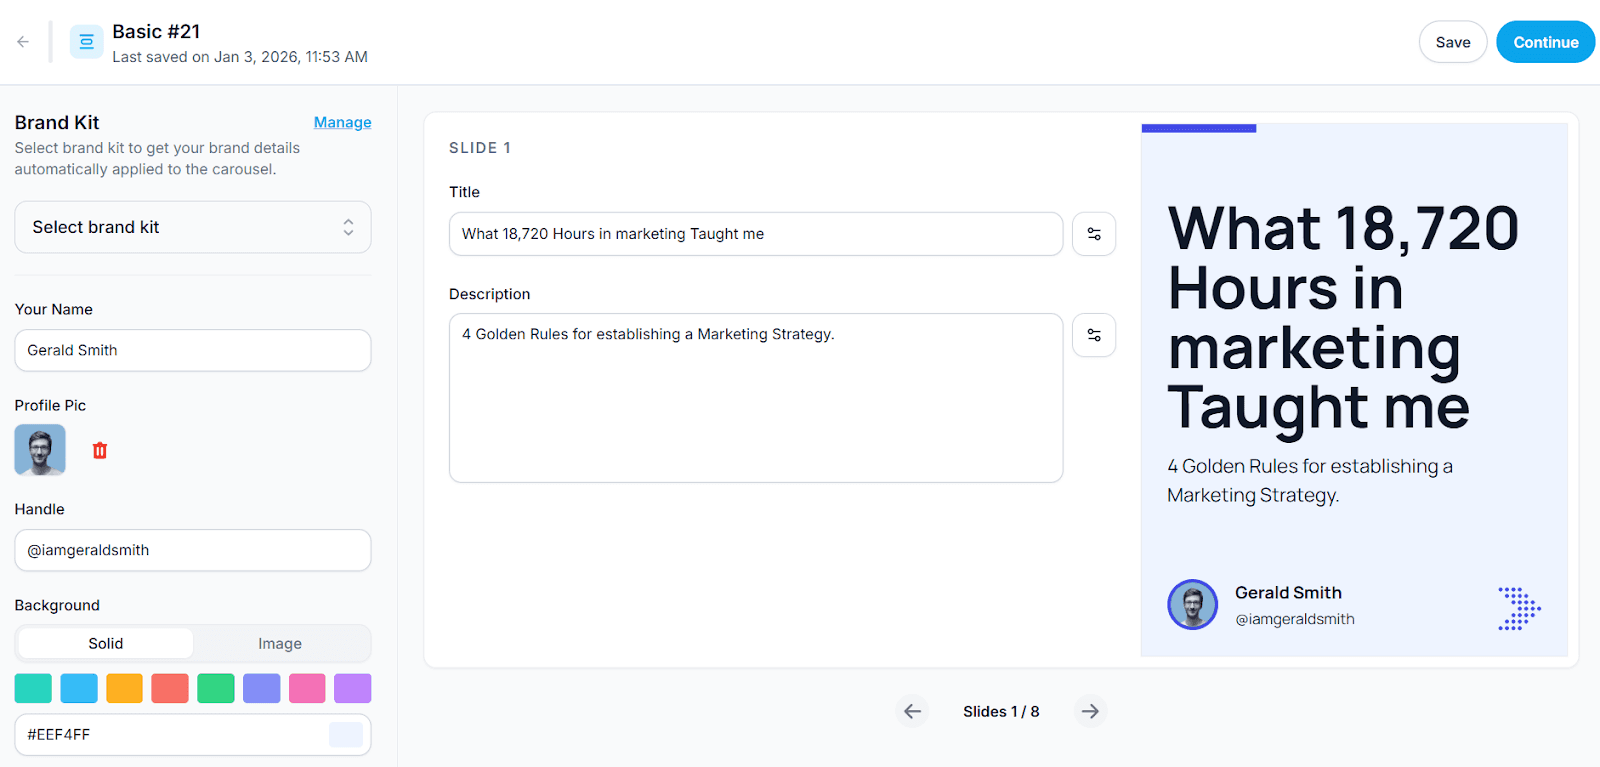
Even though Supergrow lets you customize each template by creating it, where you can choose your fonts and colors, you can also add your profile image to your carousels for extra personalization.
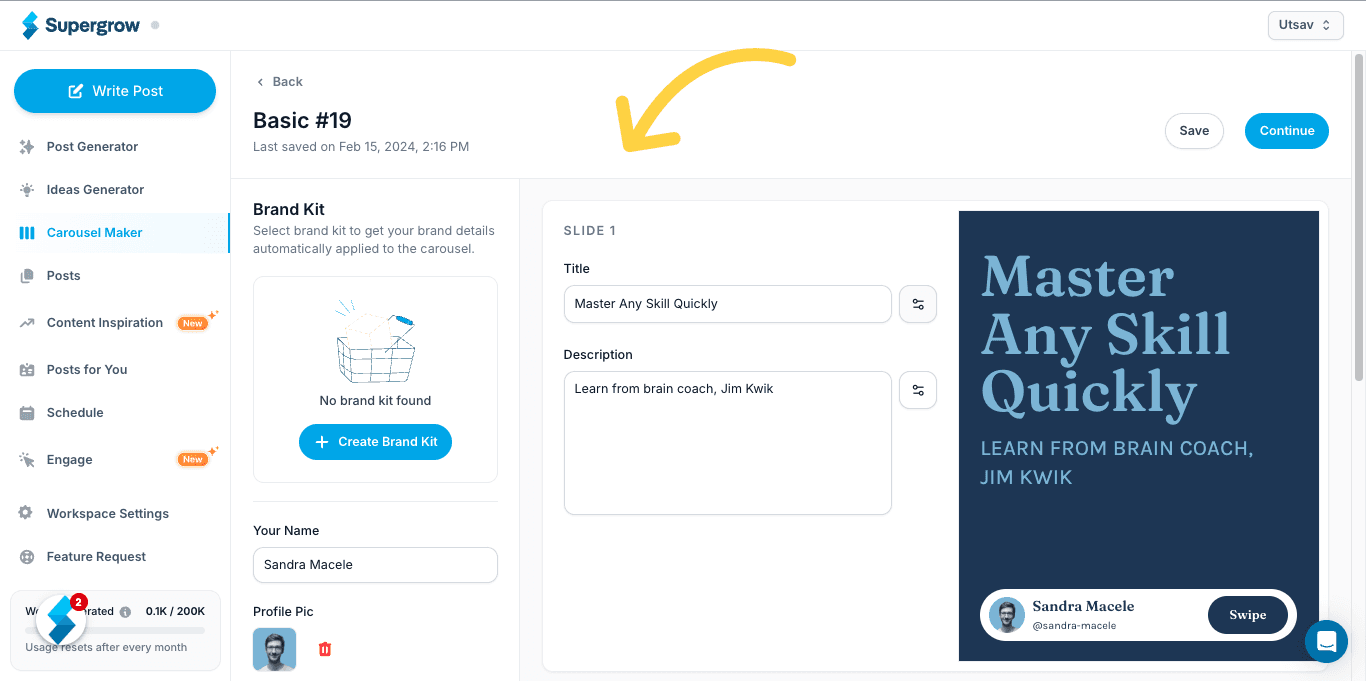
After finding a template you like, simply click on it to start editing.
With Supergrow’s template, you can customize every element of the template you’ve chosen.
Step 3. Design Your Cover Slide
Creator uniqueness comes from two things: the unique insights you share and the quality of the content you actually create. You need good ideas, good copy and a signature format to do well in LinkedIn carousels.
Your cover slide is the first thing that people will see in their LinkedIn feed. A unique signature style makes your carousels go from good to unforgettable. It makes your work instantly recognizable, helping your audience identify your posts before even seeing your name.
Here's how to create an effective cover slide:
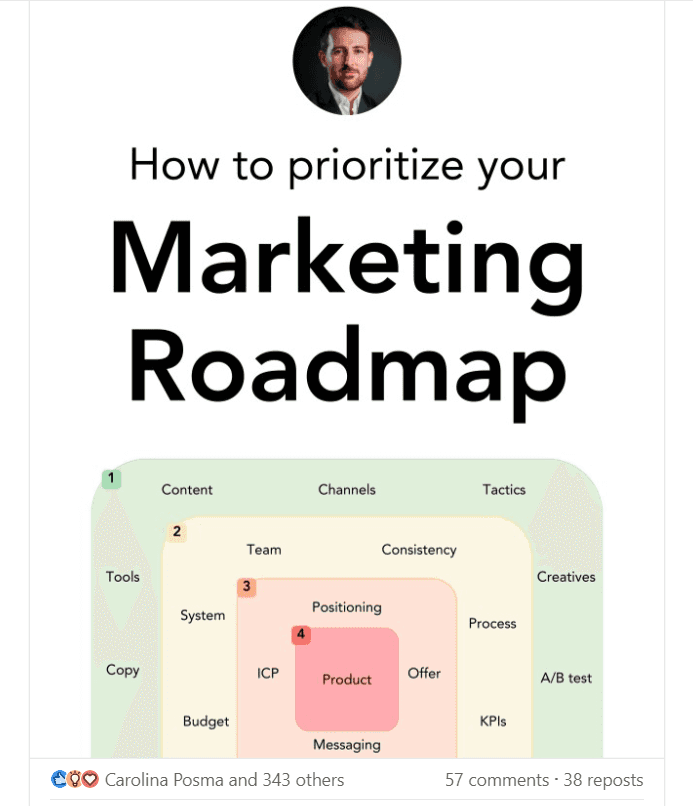
Analyse big creators–When you analyze creators experiencing hypergrowth, you’ll often notice they have a signature format, that is, their cover slide is:
Result oriented
Addresses a hot topic
Based on real data
When you're on your first slide, make sure it's engaging enough to prompt people to turn to the other slides.
 |  |
Write a clear and compelling headline — one that tells your audience exactly what they'll learn from your carousel.
Supergrow’s templates mimic the designs of LinkedIn carousels that often get the most engagement. So, when you select a template, you only have to focus on getting the content and brand colors right and leave all design elements to us.
From the design perspective, consider the following:
Use consistent branding
Avoid using fancy fonts
Include a strong visual element
Add the text "Swipe ➡️" or "Slide ➡️" in the bottom right corner
Make your headline big enough to read even on mobile devices
Consider adding your logo or photo to build brand recognition—Remember to test how your cover slide looks on different devices– that's what determines how it will appear in the LinkedIn feed. You can clearly see the difference between the viewing sizes below.
If someone views your carousel on a desktop, it will appear larger than on mobile. So, if your fonts are too small or images are compressed, it will affect your reader’s viewing experience.
 |  |
When you're happy with how it looks, you're ready to move on to creating the rest of your slides.
Step 4. Design and Write Your Content Slides
Now that you have your cover slide, it's time to create the rest of your carousel. Remember, each slide should flow naturally from the last one, telling your story.
But the hardest part of creating LinkedIn carousels is finding newer ideas. Unlike other LinkedIn carousel generator platforms like Canva, which focus solely on design, Supergrow helps you create carousel content in minutes using AI.
You can feed Supergrow a blog, podcast, PDF, or even a video and instantly generate LinkedIn-ready posts. You can train your personal AI on past posts so the posts sound authentic and you, not generic.
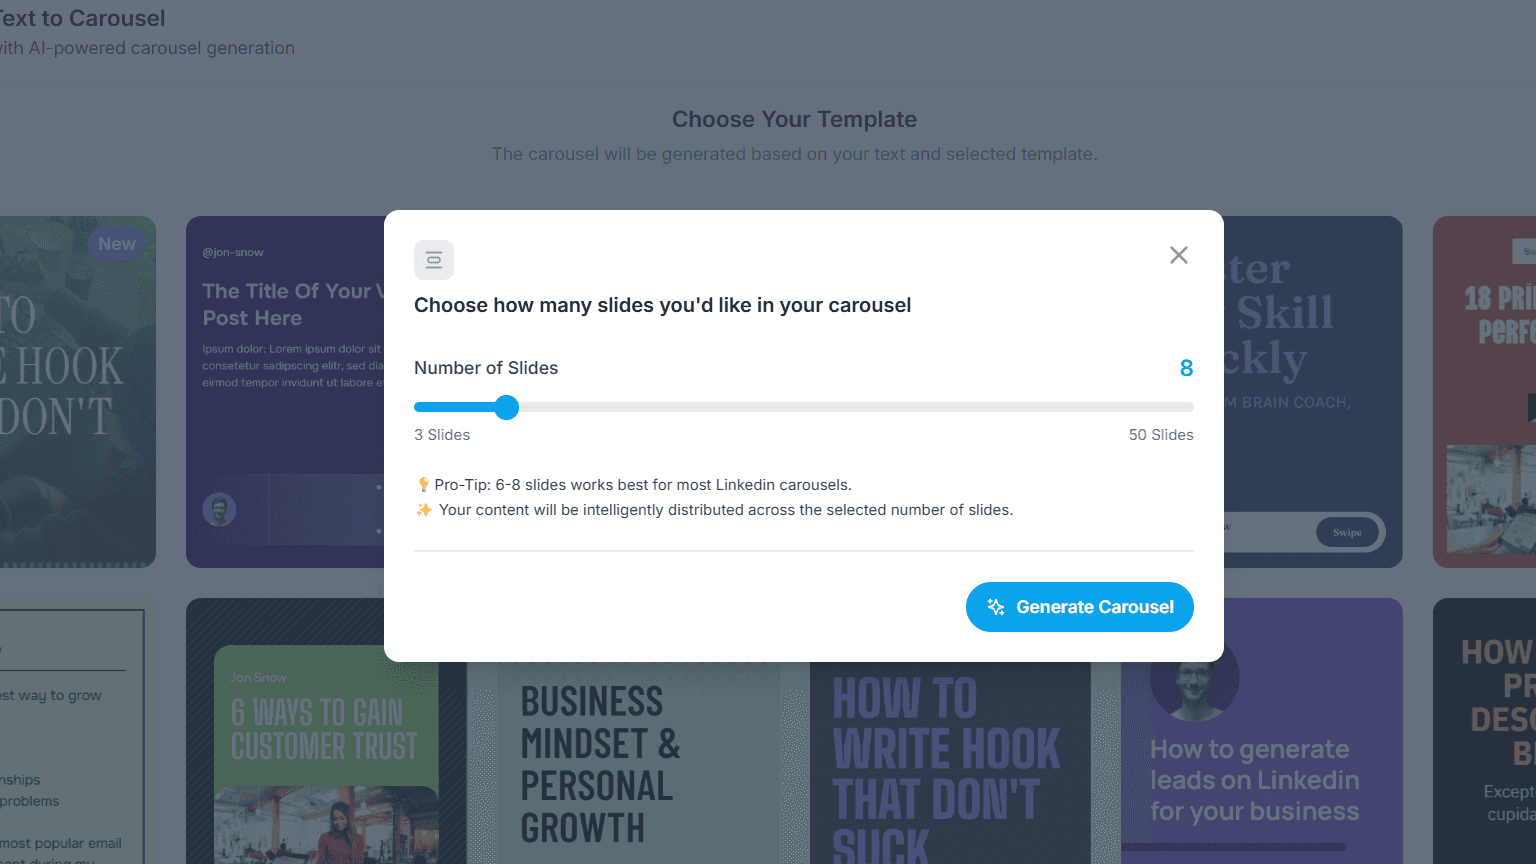
To speed up the process, use the “Text to Carousel” feature in Carousel Maker to transform any idea into LinkedIn carousels. Add the text, template, and select the number of slides, and voila–you’ll get your LinkedIn carousel ready in under a minute.
From the content perspective, keep these tips when writing each slide's content:
Keep your text short and sweet
Use simple, conversational language
Start each slide with a clear heading
Use numbers or bullets to show the sequence
For the design part, keep in mind the following:
Leave plenty of white space
Maintain consistent fonts and colors across all slides
Use high-quality images or icons to support your text
Make sure the text is large enough to read on a mobile
Use visual hierarchy (make important text bigger)
Pro Tip: If you’re creating LinkedIn carousels manually, duplicate the first slide to maintain brand consistency throughout the carousel.
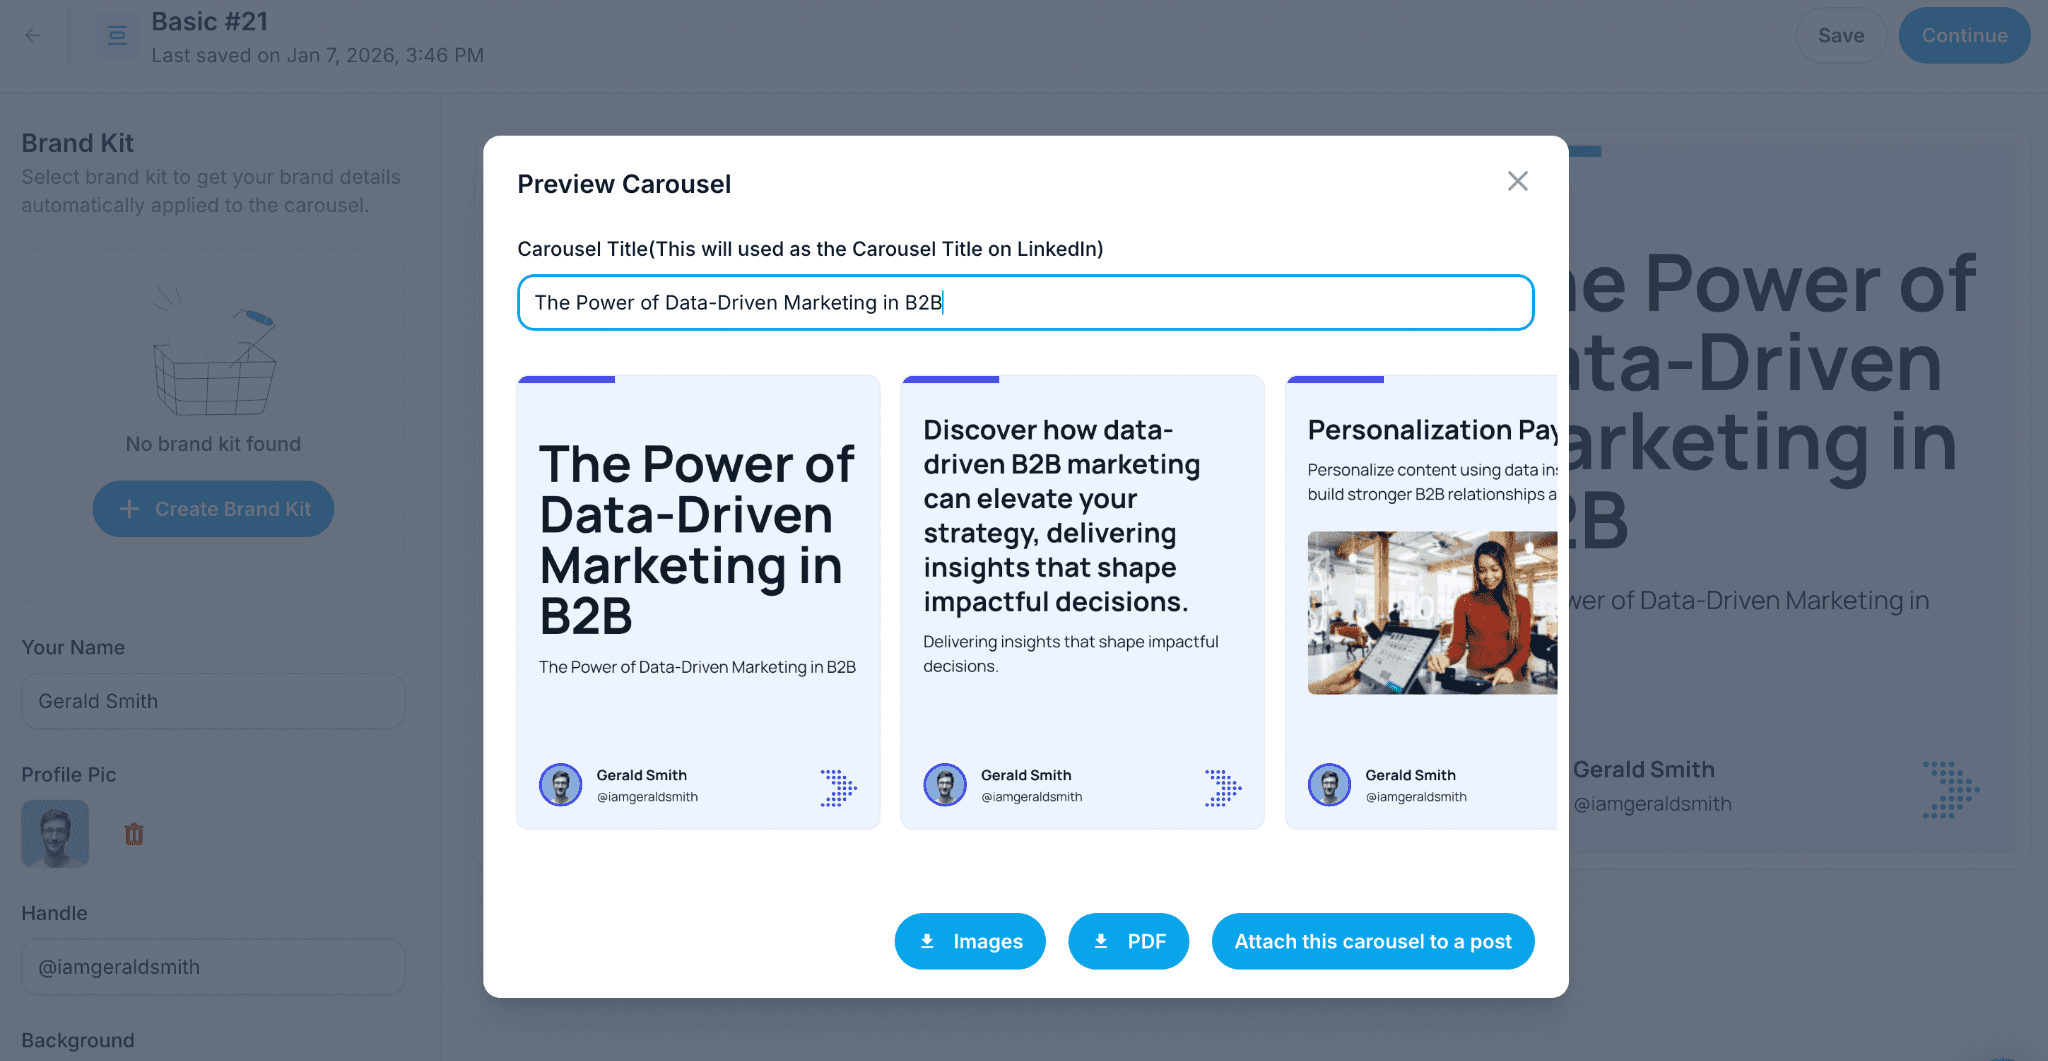
Step 5. Write the Post Caption and Publish (Directly From Supergrow)
Once you're happy with all your slides, it's time to publish them on LinkedIn.
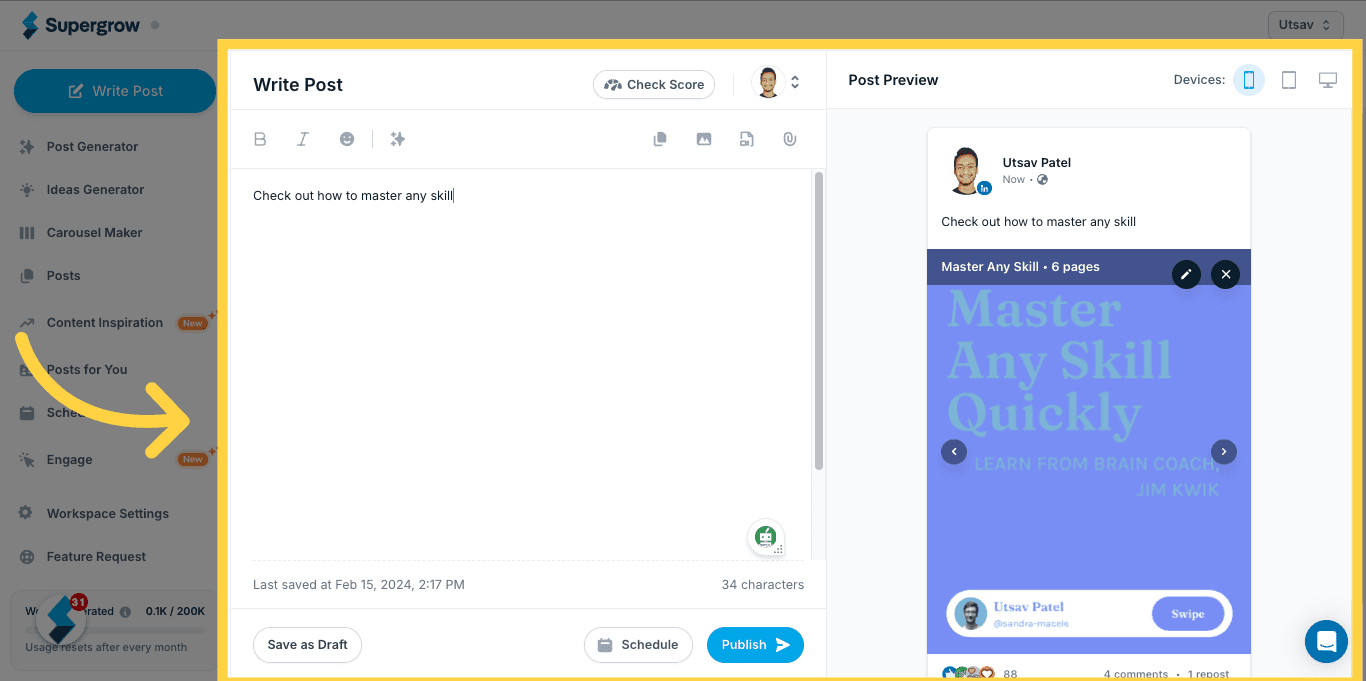
Click “Attach this carousel to a post”, and Supergrow moves you straight into the post editor with your carousel already embedded—no downloads, no re-uploads, no context switching.
Write a caption that earns the swipe. You can use Supergrow’s AI Post Generator if you want a fast, on-brand caption trained on your past posts—so it sounds like you, not a template.
Lead with a sharp hook that frames the problem or promise, add one line of context, then let the carousel deliver the value. Your goal is curiosity, not explanation.
Once everything is in order, hit publish immediately or schedule it for peak engagement using Supergrow’s LinkedIn-first calendar. Turn on auto-plug comments to drop hashtags, context, or a CTA as the first comment—without hurting reach.

This step is what makes Supergrow different. You’re not just creating carousels—you’re publishing, scheduling, engaging, and capturing momentum from one place. No extra tools. No broken workflow. Just press publish and move on to the next post.
Final Thoughts: From One-Off Carousels to a Repeatable System
If you’ve been creating LinkedIn carousels manually, you already know the pain: too many tools, too much effort, and no real system to stay consistent. Canva works when you post occasionally—but the moment you want to publish regularly, test formats, or build momentum, the workflow starts breaking. The result is stalled growth, missed opportunities, and content that feels harder than it should.
The creators who win on LinkedIn in 2026 don’t just design better carousels—they run a repeatable publishing system. One where ideas, design, captions, scheduling, and engagement live in one place, and every post compounds over time instead of starting from scratch.
👉 Create your next LinkedIn carousel with Supergrow and turn content creation into a scalable, conversion-ready workflow. Start your 7-day free trial today!

Related Articles


Turn expert thinking into strategic LinkedIn® visibility that drives influence and revenue.
© 2026 Supergrow. All rights reserved.
LinkedIn is the registered trademark of LinkedIn Corporation or its affiliates. The use of the LinkedIn trademark in connection with this product does not signify any affiliation with or endorsement by LinkedIn Corporation or its affiliates.