

LinkedIn's built-in scheduler lets you plan posts for your profile or a company Page, from 10 minutes to 3 months ahead. Every post you schedule waits in a list behind the Clock icon in the post box. From that list, you can preview a post, edit its text or image, change its time or delete it before it goes live.
This guide covers the exact clicks on desktop, mobile and LinkedIn Pages, what the scheduler can't do, and how teams manage scheduled posts across several profiles.
Where to find your scheduled posts on LinkedIn
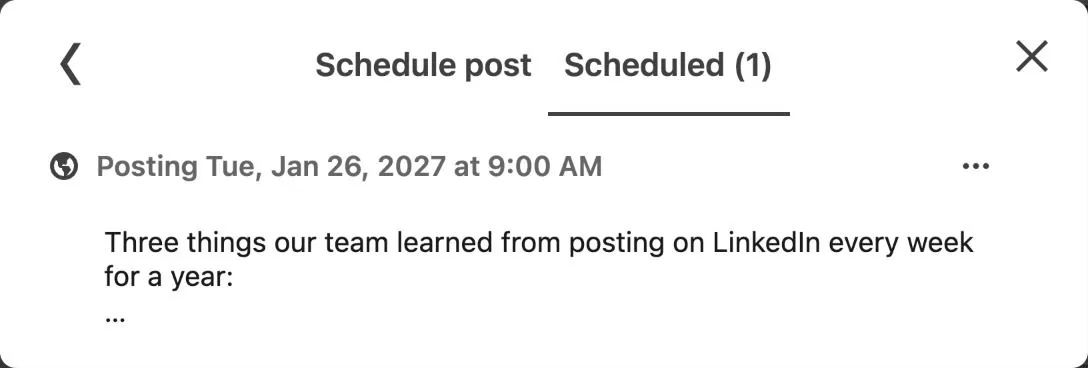
To see your scheduled posts on LinkedIn, click Start a post on your homepage, click the Clock icon, then open the Scheduled tab. LinkedIn Help calls this step "View all scheduled posts." On the mobile app, tap Post, tap the Clock icon, then tap View all. The Scheduled tab also shows how many posts are waiting, such as "Scheduled (1)".
How to schedule a post on LinkedIn
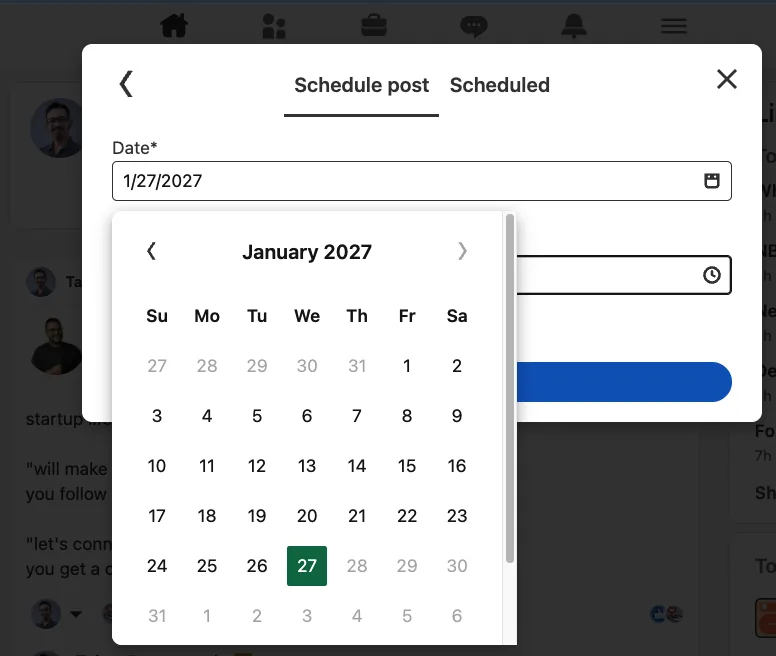
Yes, you can schedule LinkedIn posts on desktop and in the mobile app, anywhere from 10 minutes to 3 months ahead. The date picker sets the exact limit. For example, if the current date is October 30, 2026, the furthest date it allowed was January 27, 2027, which is 89 days out. So plan for just under three calendar months.
On desktop
-
Click Start a post at the top of your homepage.
-
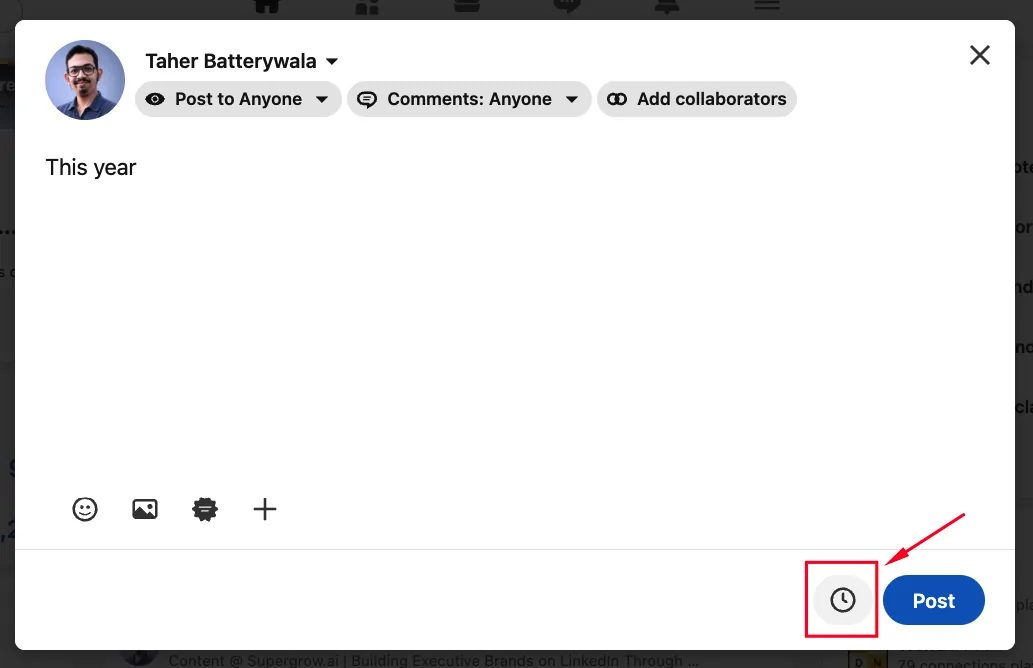
Write your post and add any image or video.
-
Click the Clock icon in the lower right, next to Post.
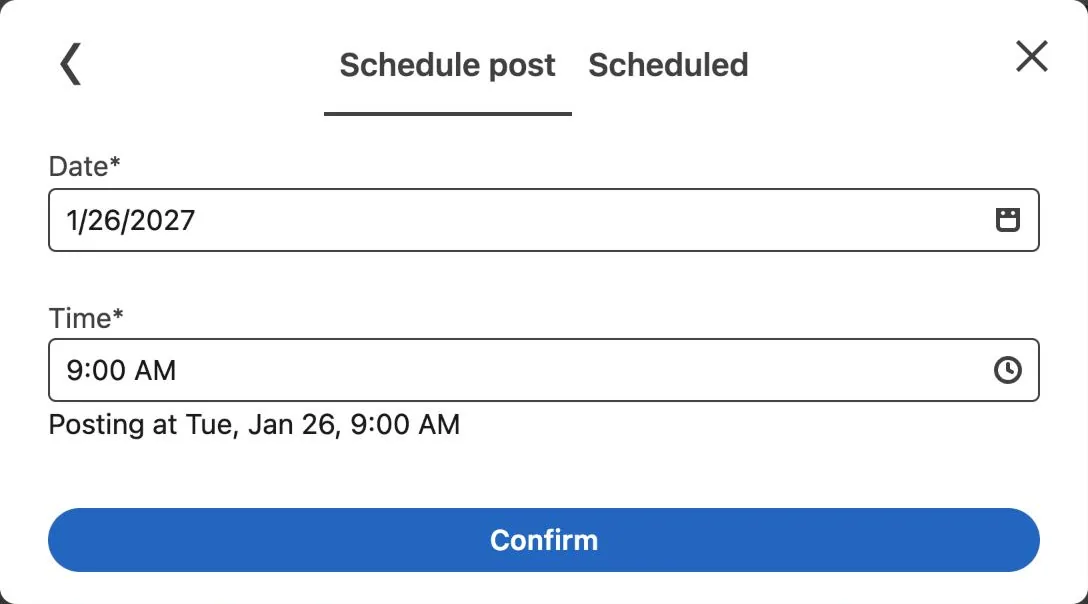
- Pick a date, then pick a time from the list or type an exact time. The "Posting at" line under the fields confirms your choice.
-
Click Confirm.
-
Back in the post box, click Schedule.
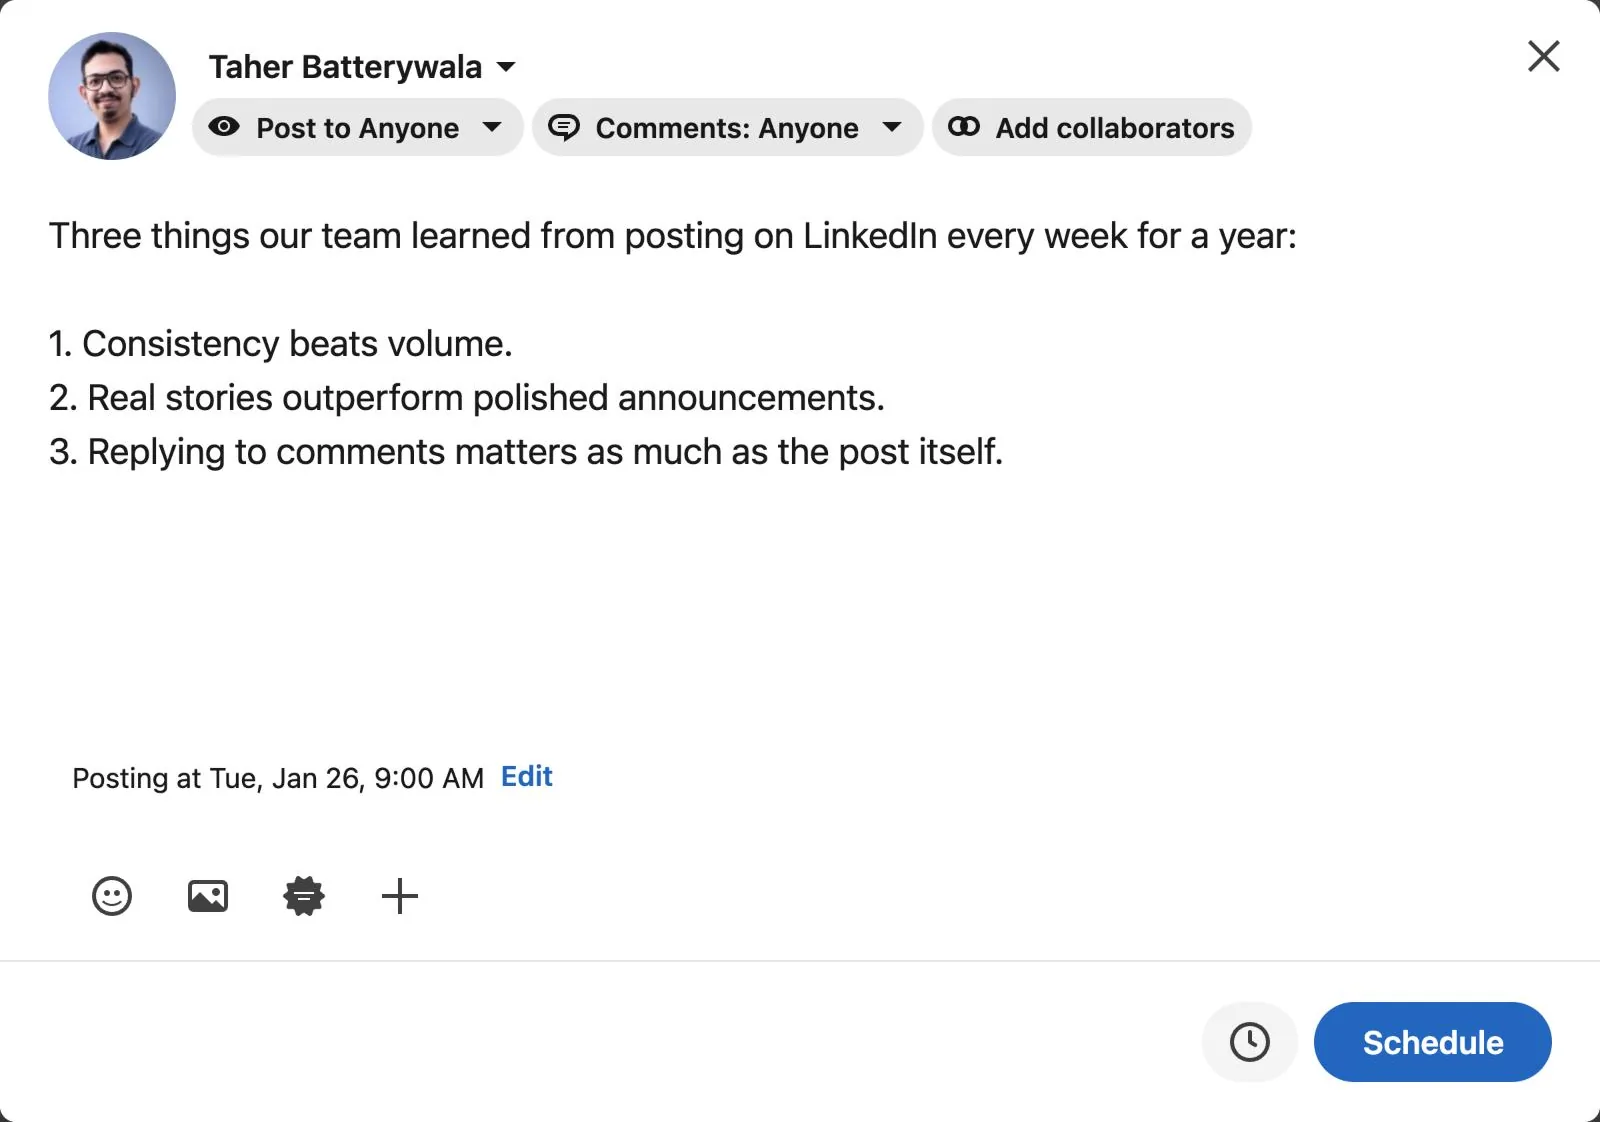
A "Post scheduled" message then appears in the lower left, with a link to view your scheduled posts.

LinkedIn converts your chosen time to UTC from your device's time zone, so check that your computer's time zone is correct before you schedule. If you pick a time less than 10 minutes away, LinkedIn shows "Please enter a valid time" and won't let you confirm.
On the mobile app
- Tap Post.
- Write your post.
- Tap the Clock icon in the upper right.
- Pick a date and time, then tap Next.
- Tap Schedule.
Changed your mind before confirming? Tap Edit next to the time, then tap Clear. You can then post right away or discard the draft.
For a LinkedIn Page
Only super admins and content admins can schedule Page posts. A Page post can go out from 1 hour to 3 months ahead, and the time is based on your location.
-
On desktop: Open your Page admin view, click Page posts, click Start a post, then click the schedule icon. Choose the date and time, click Next, then click Schedule.
-
On mobile: Open your Page Dashboard, tap Page posts, tap Post, then tap the schedule icon. Tap Next, then tap Schedule.
How to see, edit, reschedule or delete scheduled posts
Every change to a scheduled post starts from the same list, so you only need to learn one path.
See your scheduled posts
On desktop, click Start a post, click the Clock icon, then open the Scheduled tab.
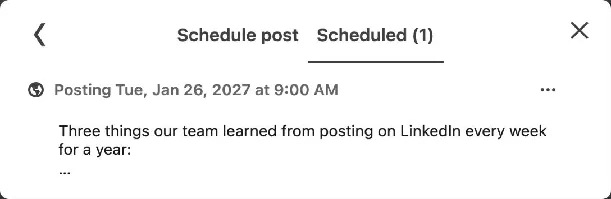
Each entry shows the publishing date and time, such as "Posting Tue, Jan 26, 2027 at 9:00 AM," followed by the first lines of the post. Click a post to preview it.
In the mobile app, tap Post, tap the Clock icon, then tap View all.
Edit or reschedule a scheduled post
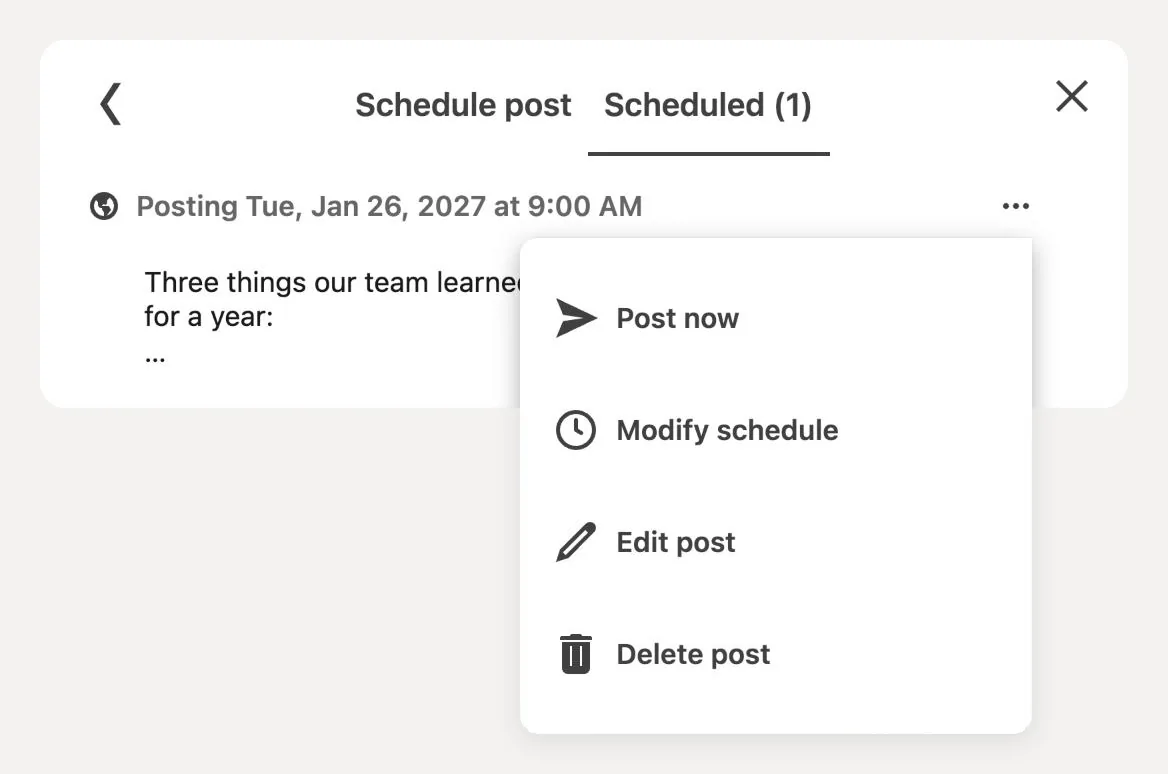
Click the More icon (three dots) next to the post. The menu gives you four options:
-
Post now: publishes the post right away.
-
Modify schedule: moves it to a new date and time.
-
Edit post: reopens the post so you can change it.
-
Delete post: removes it from the schedule.
In Edit post, you can change both the text and the image.
The image shows a pencil to edit it and an X to remove it.
To move the time while you're there, click Edit next to "Posting at," then click Schedule to save your changes.
The mobile app offers the same Modify schedule and Edit post options.
You no longer need to delete and recreate a post to fix a typo or swap an image.
Delete (cancel) a scheduled post
Click the More icon, then Delete post. LinkedIn asks you to confirm, because the post can't be recovered once it's gone.
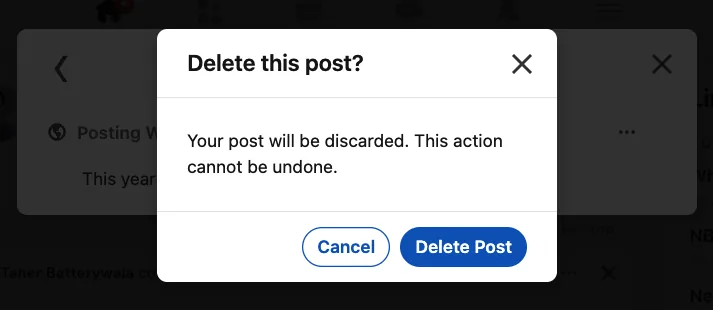
Click Delete Post, and a "Scheduled post deleted successfully" message confirms it.

In the mobile app, tap the Delete icon next to the post, then confirm.
If only the timing has changed, use Modify schedule instead and keep your post.
Scheduled posts on a LinkedIn Page
Page admins share one list of scheduled posts. Any super admin or content admin can post a scheduled post now, edit its content, visibility, comment settings or brand partnership label, reschedule it or delete it. That includes posts another admin scheduled.
If an admin is removed from the Page, their scheduled posts move to the admin who removed them, so nothing in the queue is lost.
LinkedIn's scheduler limits
| Personal profile | LinkedIn Page | |
|---|---|---|
| Who can schedule | The profile owner | Super admins and content admins |
| How far ahead | 10 minutes to 3 months | 1 hour to 3 months |
| What you can't schedule | Events and jobs | Events, multiple photos, reshares, polls, jobs and service posts |
| Edit and reschedule | Yes | Yes |
| Time zone | Your device's time zone, converted to UTC | Your location |
| Devices | Desktop and mobile | Desktop and mobile |
One more Page rule matters for paid campaigns. You can't promote a scheduled Page post through Browse existing content in Campaign Manager until it's published.
The native scheduler also leaves a few gaps:
-
No calendar view: scheduled posts sit in a list, so you can't see your week or month at a glance.
-
No comment scheduling: any first comment has to be added by hand after the post goes live.
-
No approvals for profiles: a post goes straight from the author to the schedule, with no review step.
Scheduling for a team: approvals and multiple profiles
The native scheduler works well for one person. It gets harder when a marketing team runs LinkedIn for several leaders. Each leader's posts sit in their own account, drafts go back and forth over email or Slack, and nobody sees the full week in one place.
LinkedIn has started adding team features of its own. The post box now shows an Add collaborators button with the tip "Collaborative Posts are here! Team up to put your post in front of more people."
Supergrow's LinkedIn post scheduling covers the rest of the workflow in one workspace:
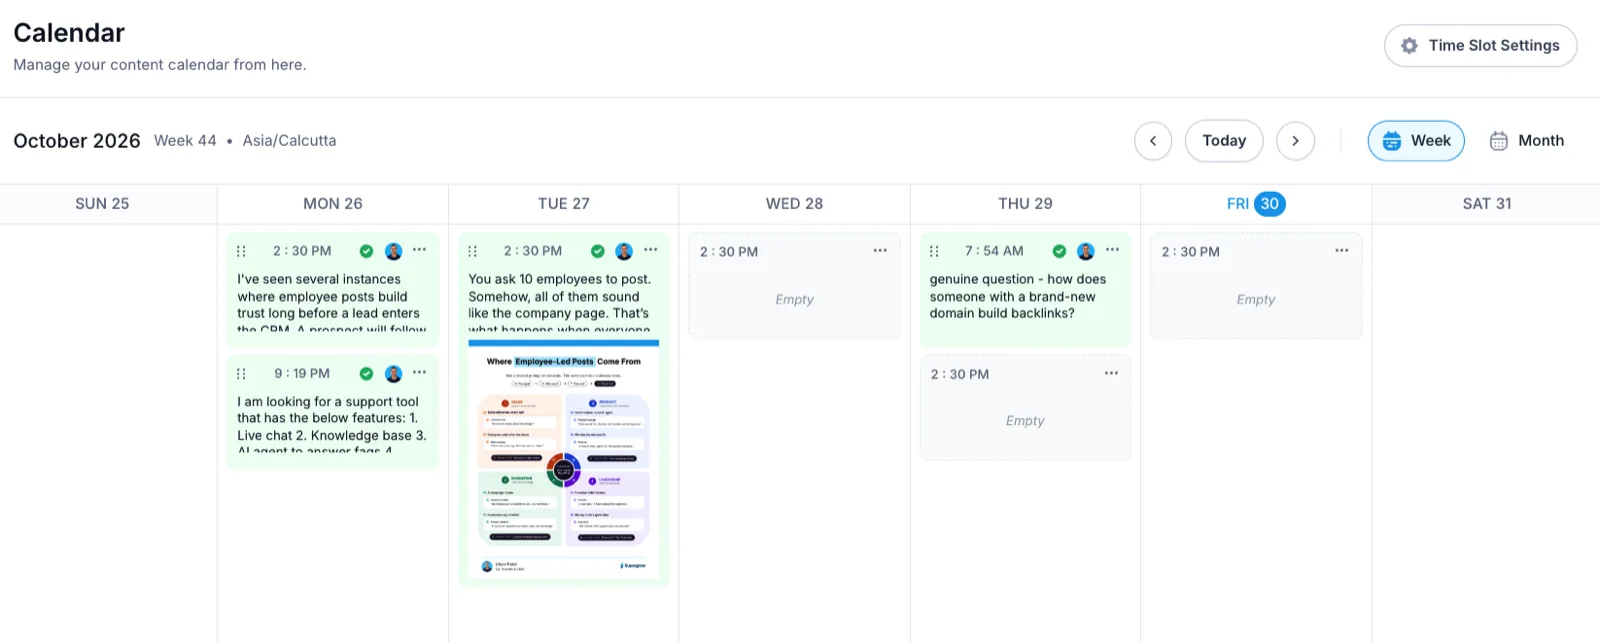
Visual calendar: see every scheduled and published post by week or month, and drag a post to a new day to reschedule it.
Smart Queue: set recurring posting slots for each person, then drop a post into the next free slot.
Kanban board: move posts through Drafts, In-Review, Changes Needed, Approved, Scheduled and Published.
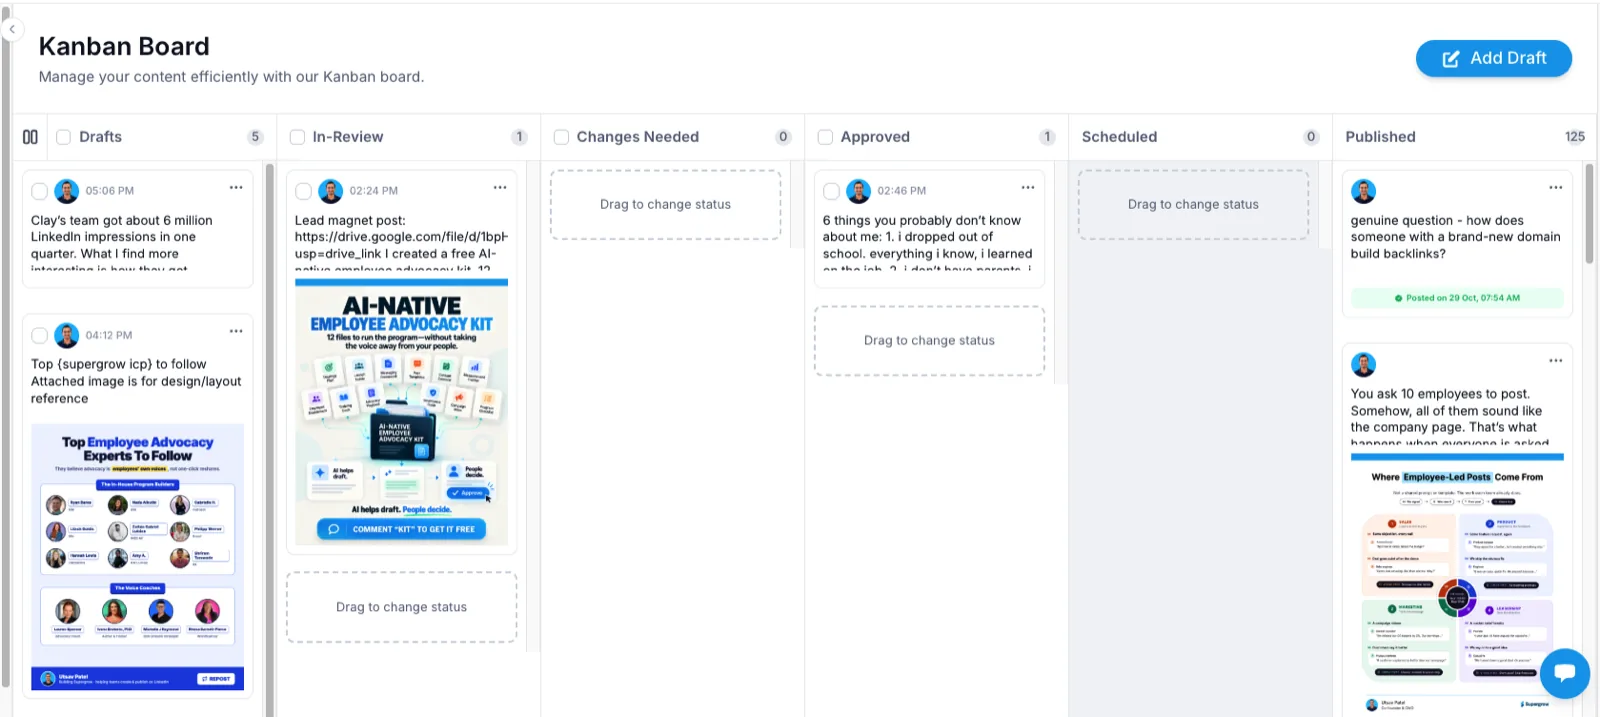
Review and approval: get a draft approved before it's scheduled, so nothing goes live unchecked.
Automatic first comment: schedule a comment with the post so it appears when the post goes live.
Every workspace in one view: Upcoming Schedule and Content Board show posts across all your team members' workspaces.
No shared passwords: each person connects their own profile through LinkedIn's official API.
You can write the post in Supergrow too, or paste in a draft you already have.
When it's ready, the Schedule Post window gives you two ways to time it.
Set Date & Time lets you type a time or pick one from the calendar in the time zone you choose.
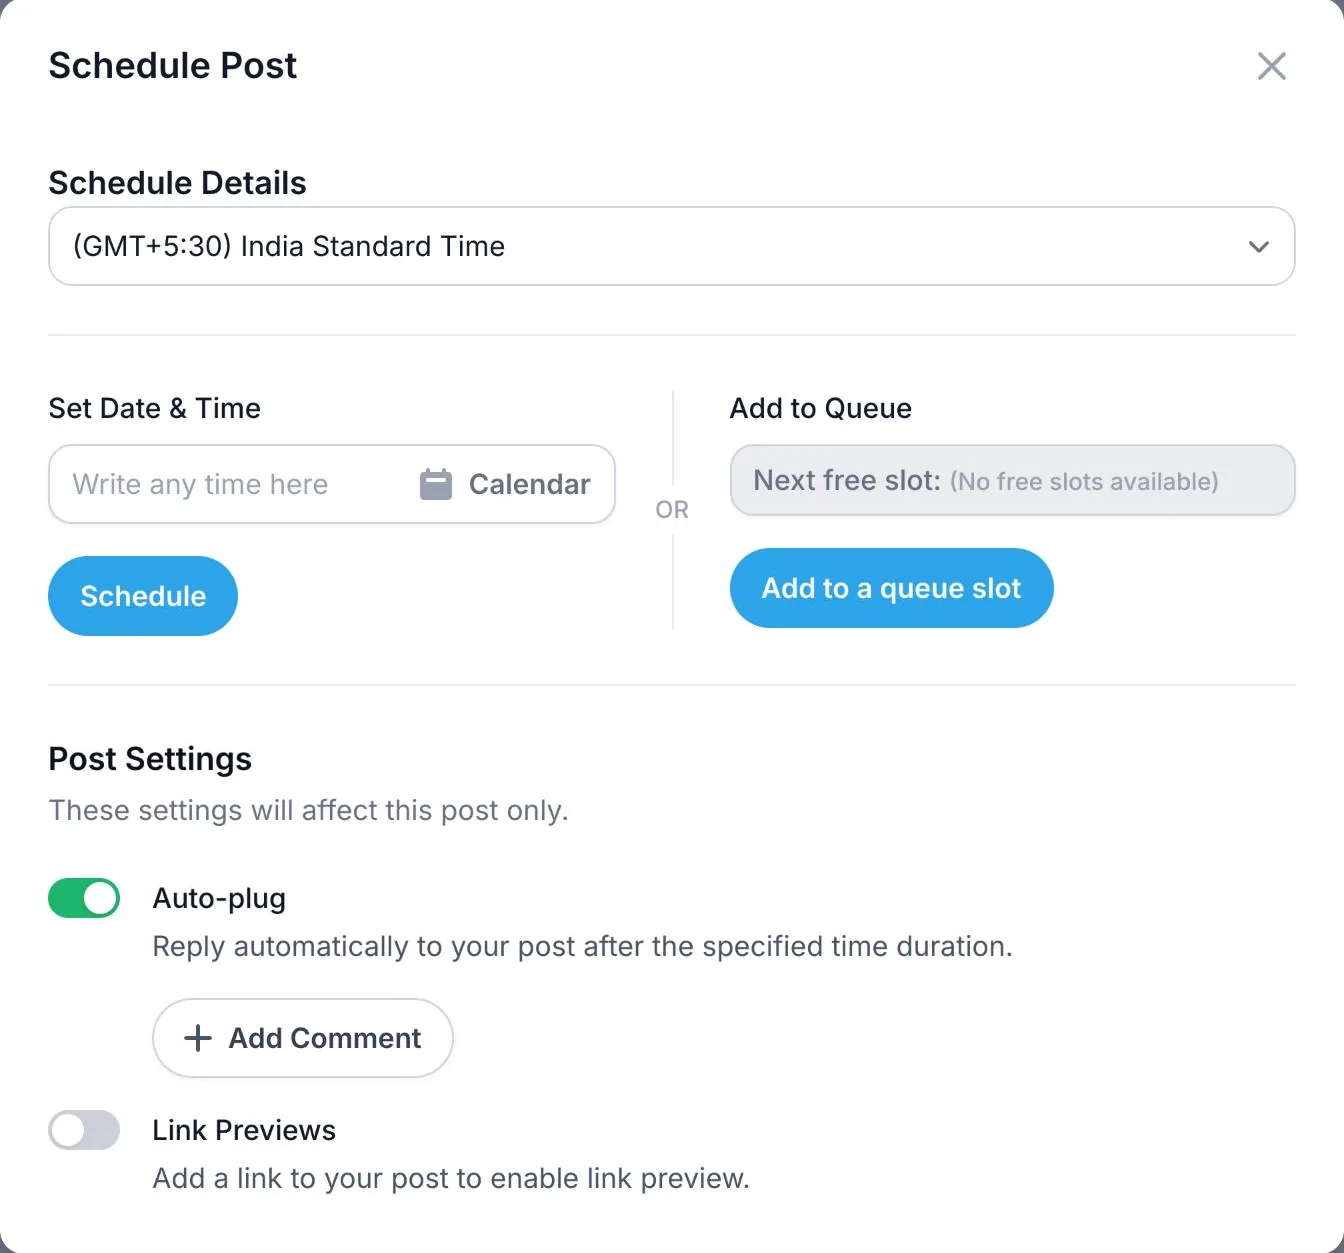
Add to Queue places the post in the next free slot. The date picker also goes beyond LinkedIn's 3-month window, with dates available into July 2027.
The same window holds settings for that post only.
Turn on Auto-plug, and Supergrow replies to your own post automatically after the time you set, using a comment you've saved in Workspace Settings under Auto-plug Comments.
It's a simple way to add a link or a call to action after the post has picked up some reach.
Tips for scheduled posts that still get conversation
Scheduling takes care of timing. The conversation around your post still depends on you.
-
Test your posting times: try different days and times for a few weeks, then keep the slots that bring the most engagement. Our guide to the best time to post on LinkedIn gives you a starting point.
-
Reply to comments yourself: check your post soon after it goes live and answer comments in your own words. Quick, thoughtful replies keep the discussion going.
-
Mix scheduled and real-time activity: keep commenting on other people's posts and sharing timely updates between your scheduled posts, so your profile never feels automated.
-
Publish fewer, stronger posts: a steady rhythm of useful posts does more for you than a packed schedule of thin ones.
-
Repurpose what works: turn a strong post into a carousel, a short video or a follow-up with a fresh angle.
-
Review your analytics monthly: look at impressions, reactions and comments to see which topics and time slots to keep.
Final Thoughts
LinkedIn's built-in scheduler now handles the basics well. You can find your scheduled posts in a few clicks, edit the text or image, change the time, and post early without starting over. Once several people's posts need review and a shared calendar, a team tool saves the back-and-forth.
Start the 7-day free trial to plan, review, and schedule your team's LinkedIn posts in one calendar, or book a demo to walk through it with your team.